 Flutter - 聊天输入框更新文本时的必备优化点🔖
# 一、问题
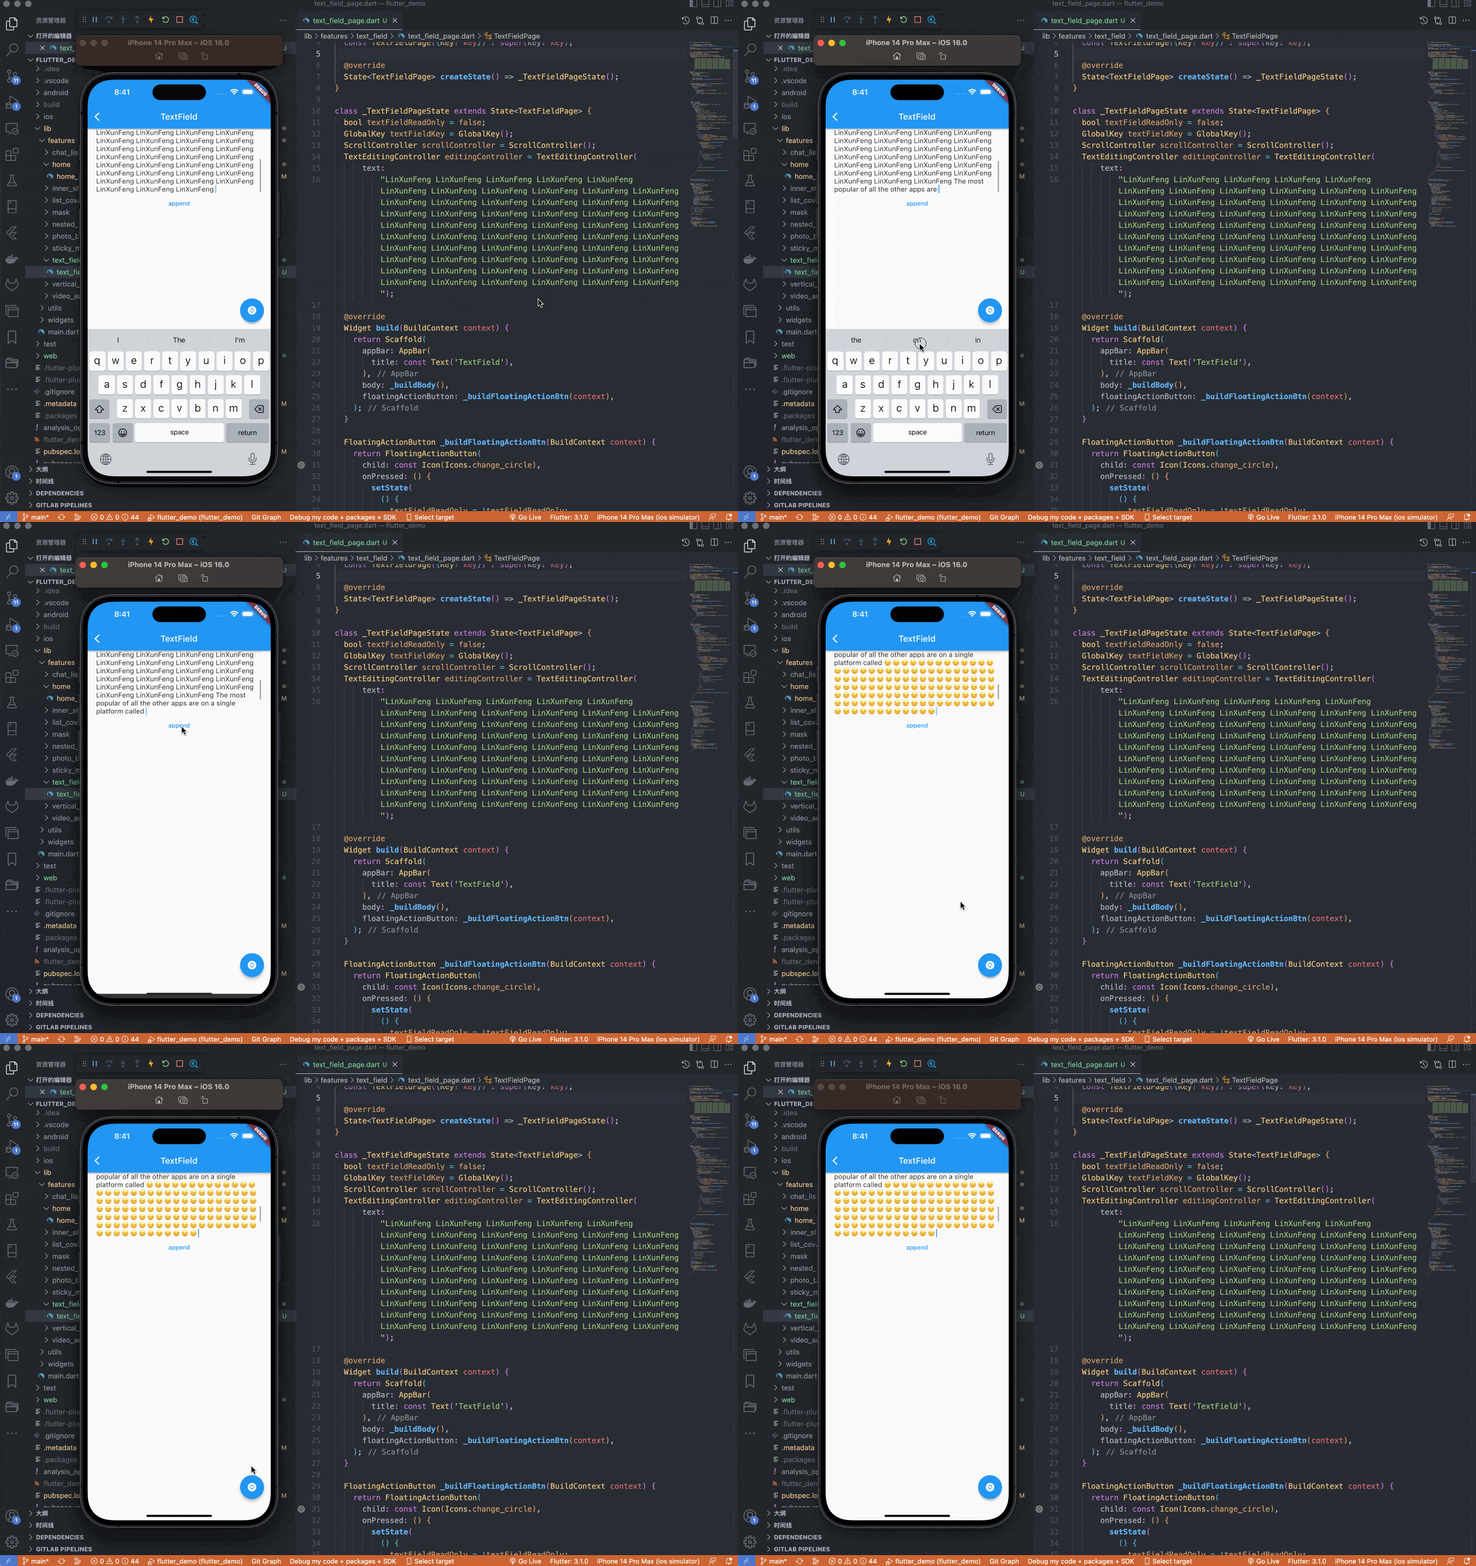
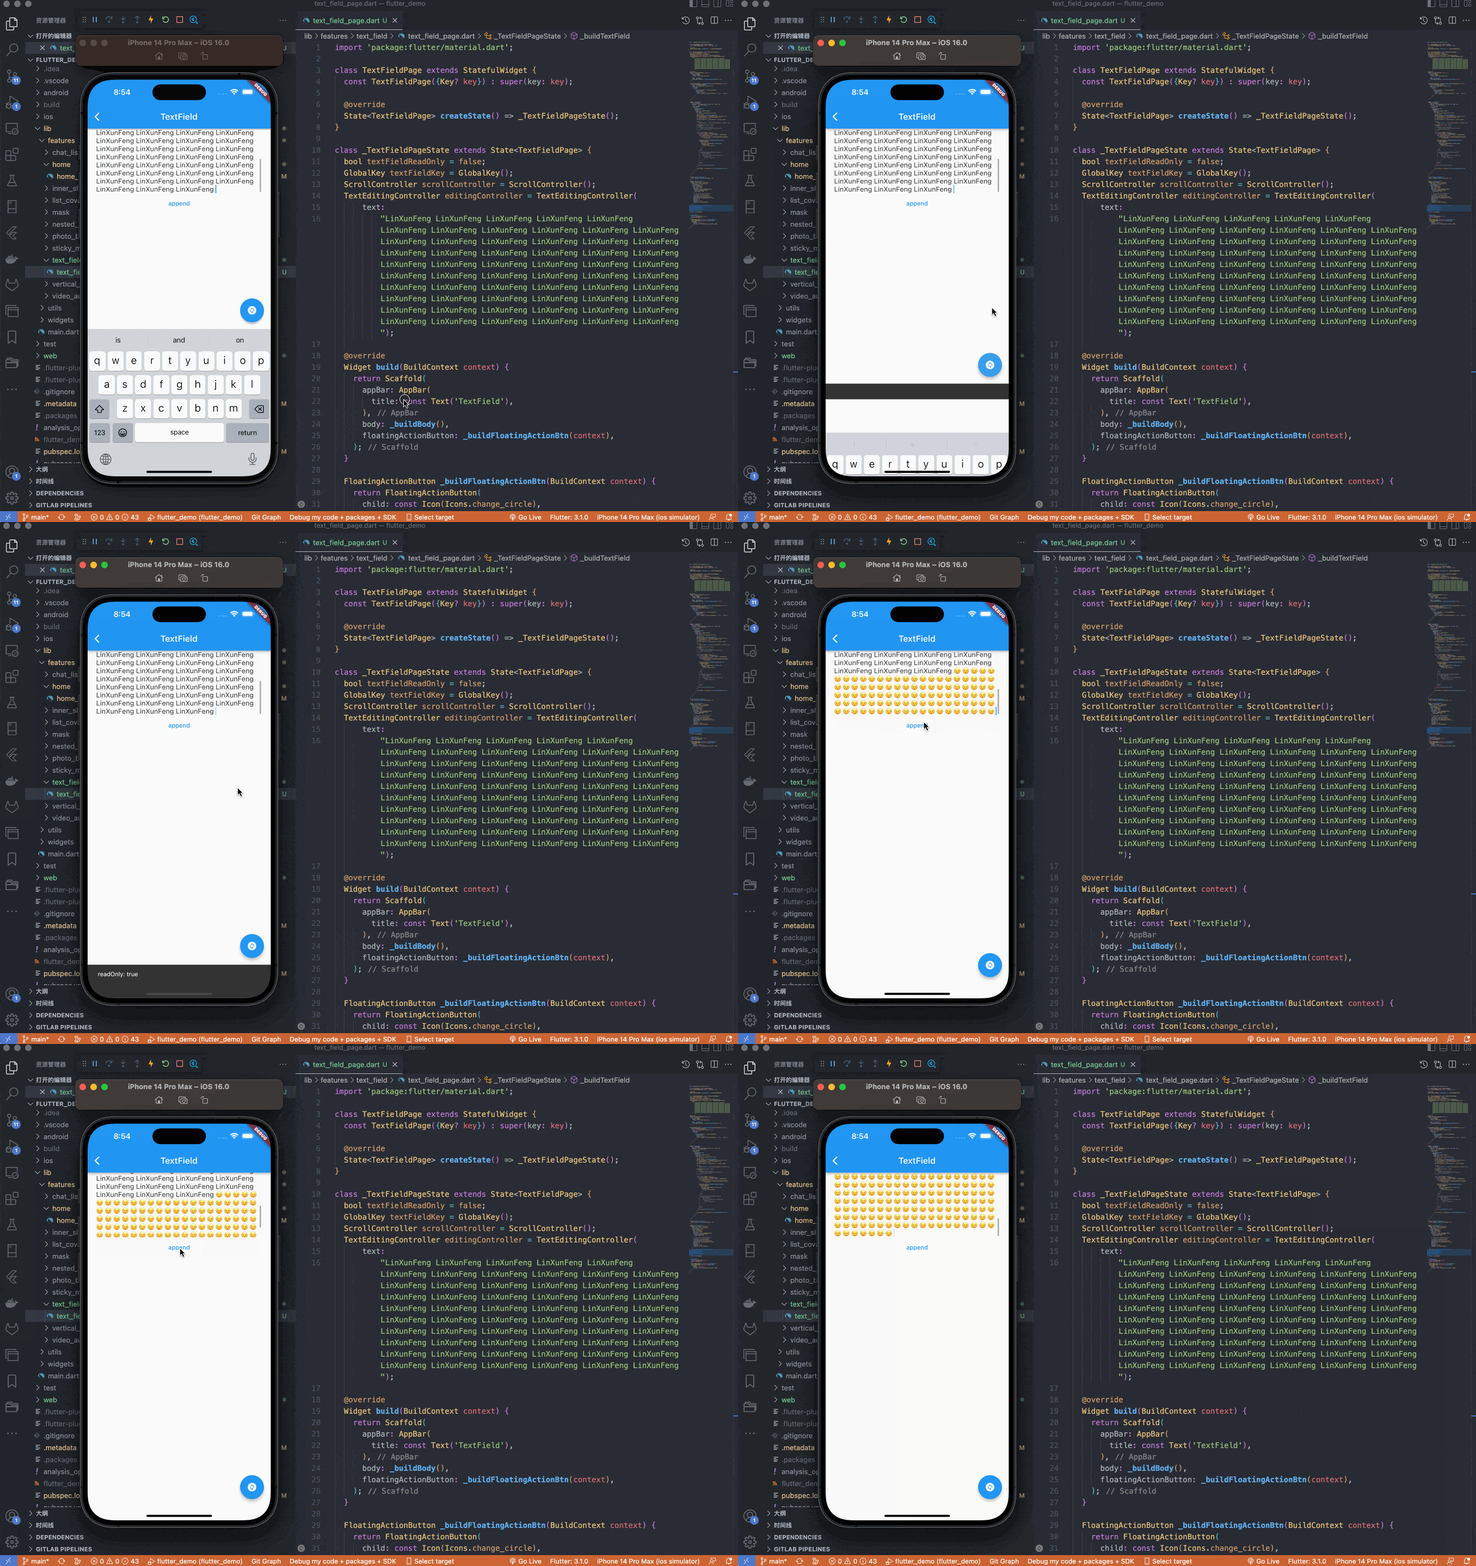
可以看出一些问题:
- 在关闭键盘的情况下,追加表情内容导致换行时,输入框并不会跟随滚动,而键盘输入文字却可以
- 滚动条在键盘出现时正常,关闭键盘时滚动条无法滑到底部
# 二、示例代码
TextField 代码
_buildTextField() {
  return Scrollbar(
    controller: scrollController,
    isAlwaysShown: true,
    child: TextField(
      key: textFieldKey,
      autofocus: true,
      decoration: const InputDecoration(
        border: InputBorder.none,
        isCollapsed: true,
      ),
      controller: editingController,
      scrollController: scrollController,
      keyboardType: TextInputType.multiline,
      maxLines: 8,
      minLines: 1,
      showCursor: true,
      readOnly: true,
    ),
  );
}
更新输入框内容的逻辑
var result = editingController.text;
// 新增的内容
String content = fetchInsertContent();
int selectionBefore = editingController.selection.start;
if (selectionBefore < 0) selectionBefore = 0;
// 更新内容后,光标的位置
int selectionAfter = selectionBefore + content.length;

result = (result.split('')..insert(selectionBefore, content)).join('');
editingController.text = result;

// 设置光标
editingController.selection = TextSelection.fromPosition(TextPosition(
  offset: selectionAfter,
));
# 三、探索与解决
# 1、输入框
当键盘输入内容时会自动滚动到底部,既然跟滚动相关,第一时间就会想到 ScrollController 的 animateTo 和 jumpTo 这两个方法,打个断点后,用键盘输入文字看看,发现果然走了断点

从调用栈里可以看到,animateTo 方法是在 EditableTextState 的 _scheduleShowCaretOnScreen 方法里调用的,该方法正是用于处理在键盘输入文字后,使 TextField 的内容自动滚动到适当的位置,保持可见。该方法在每次输入文字时都会调用,其内部有相关的滚动偏移计算逻辑。
那好了,我们现在主要就是看如何调用它,因为其是私有方法,所以需要找其它可帮我们间接调用 _scheduleShowCaretOnScreen 方法的公开方法。
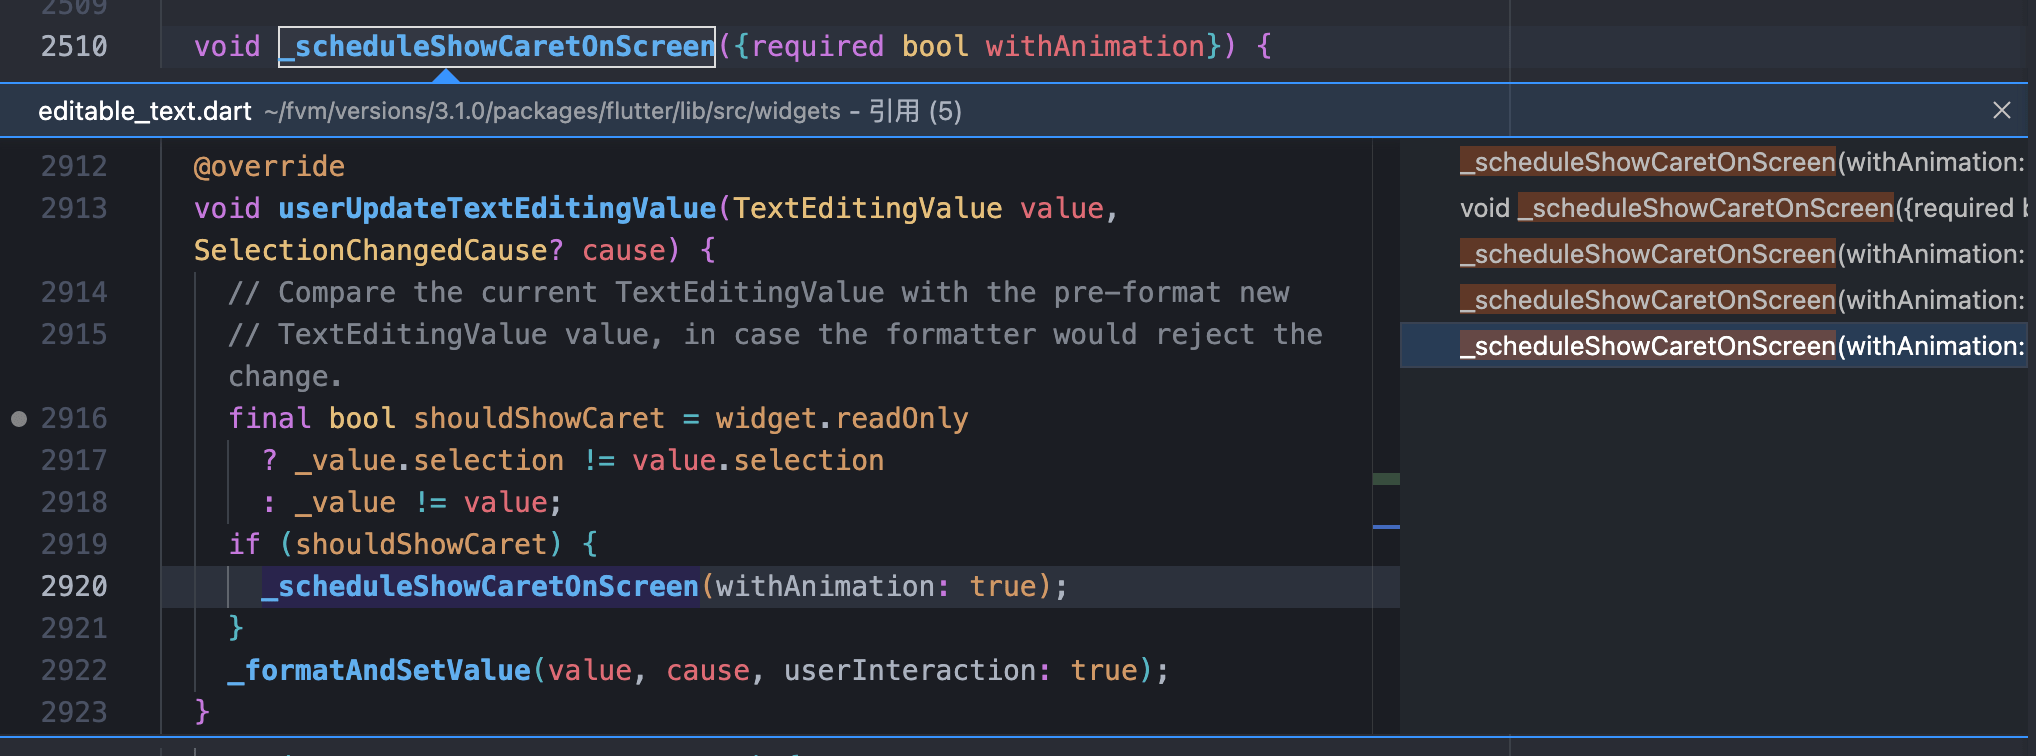
查看调用 _scheduleShowCaretOnScreen 的方法有哪些后,这里我找到了 userUpdateTextEditingValue,以下对两个形参进行说明
class TextEditingValue {
  const TextEditingValue({
    this.text = '',
    this.selection = const TextSelection.collapsed(offset: -1),
    this.composing = TextRange.empty,
  })
...
| 属性 | 描述 |
|---|---|
text | 当前文本 |
selection | 当前选中的文本下标范围 |
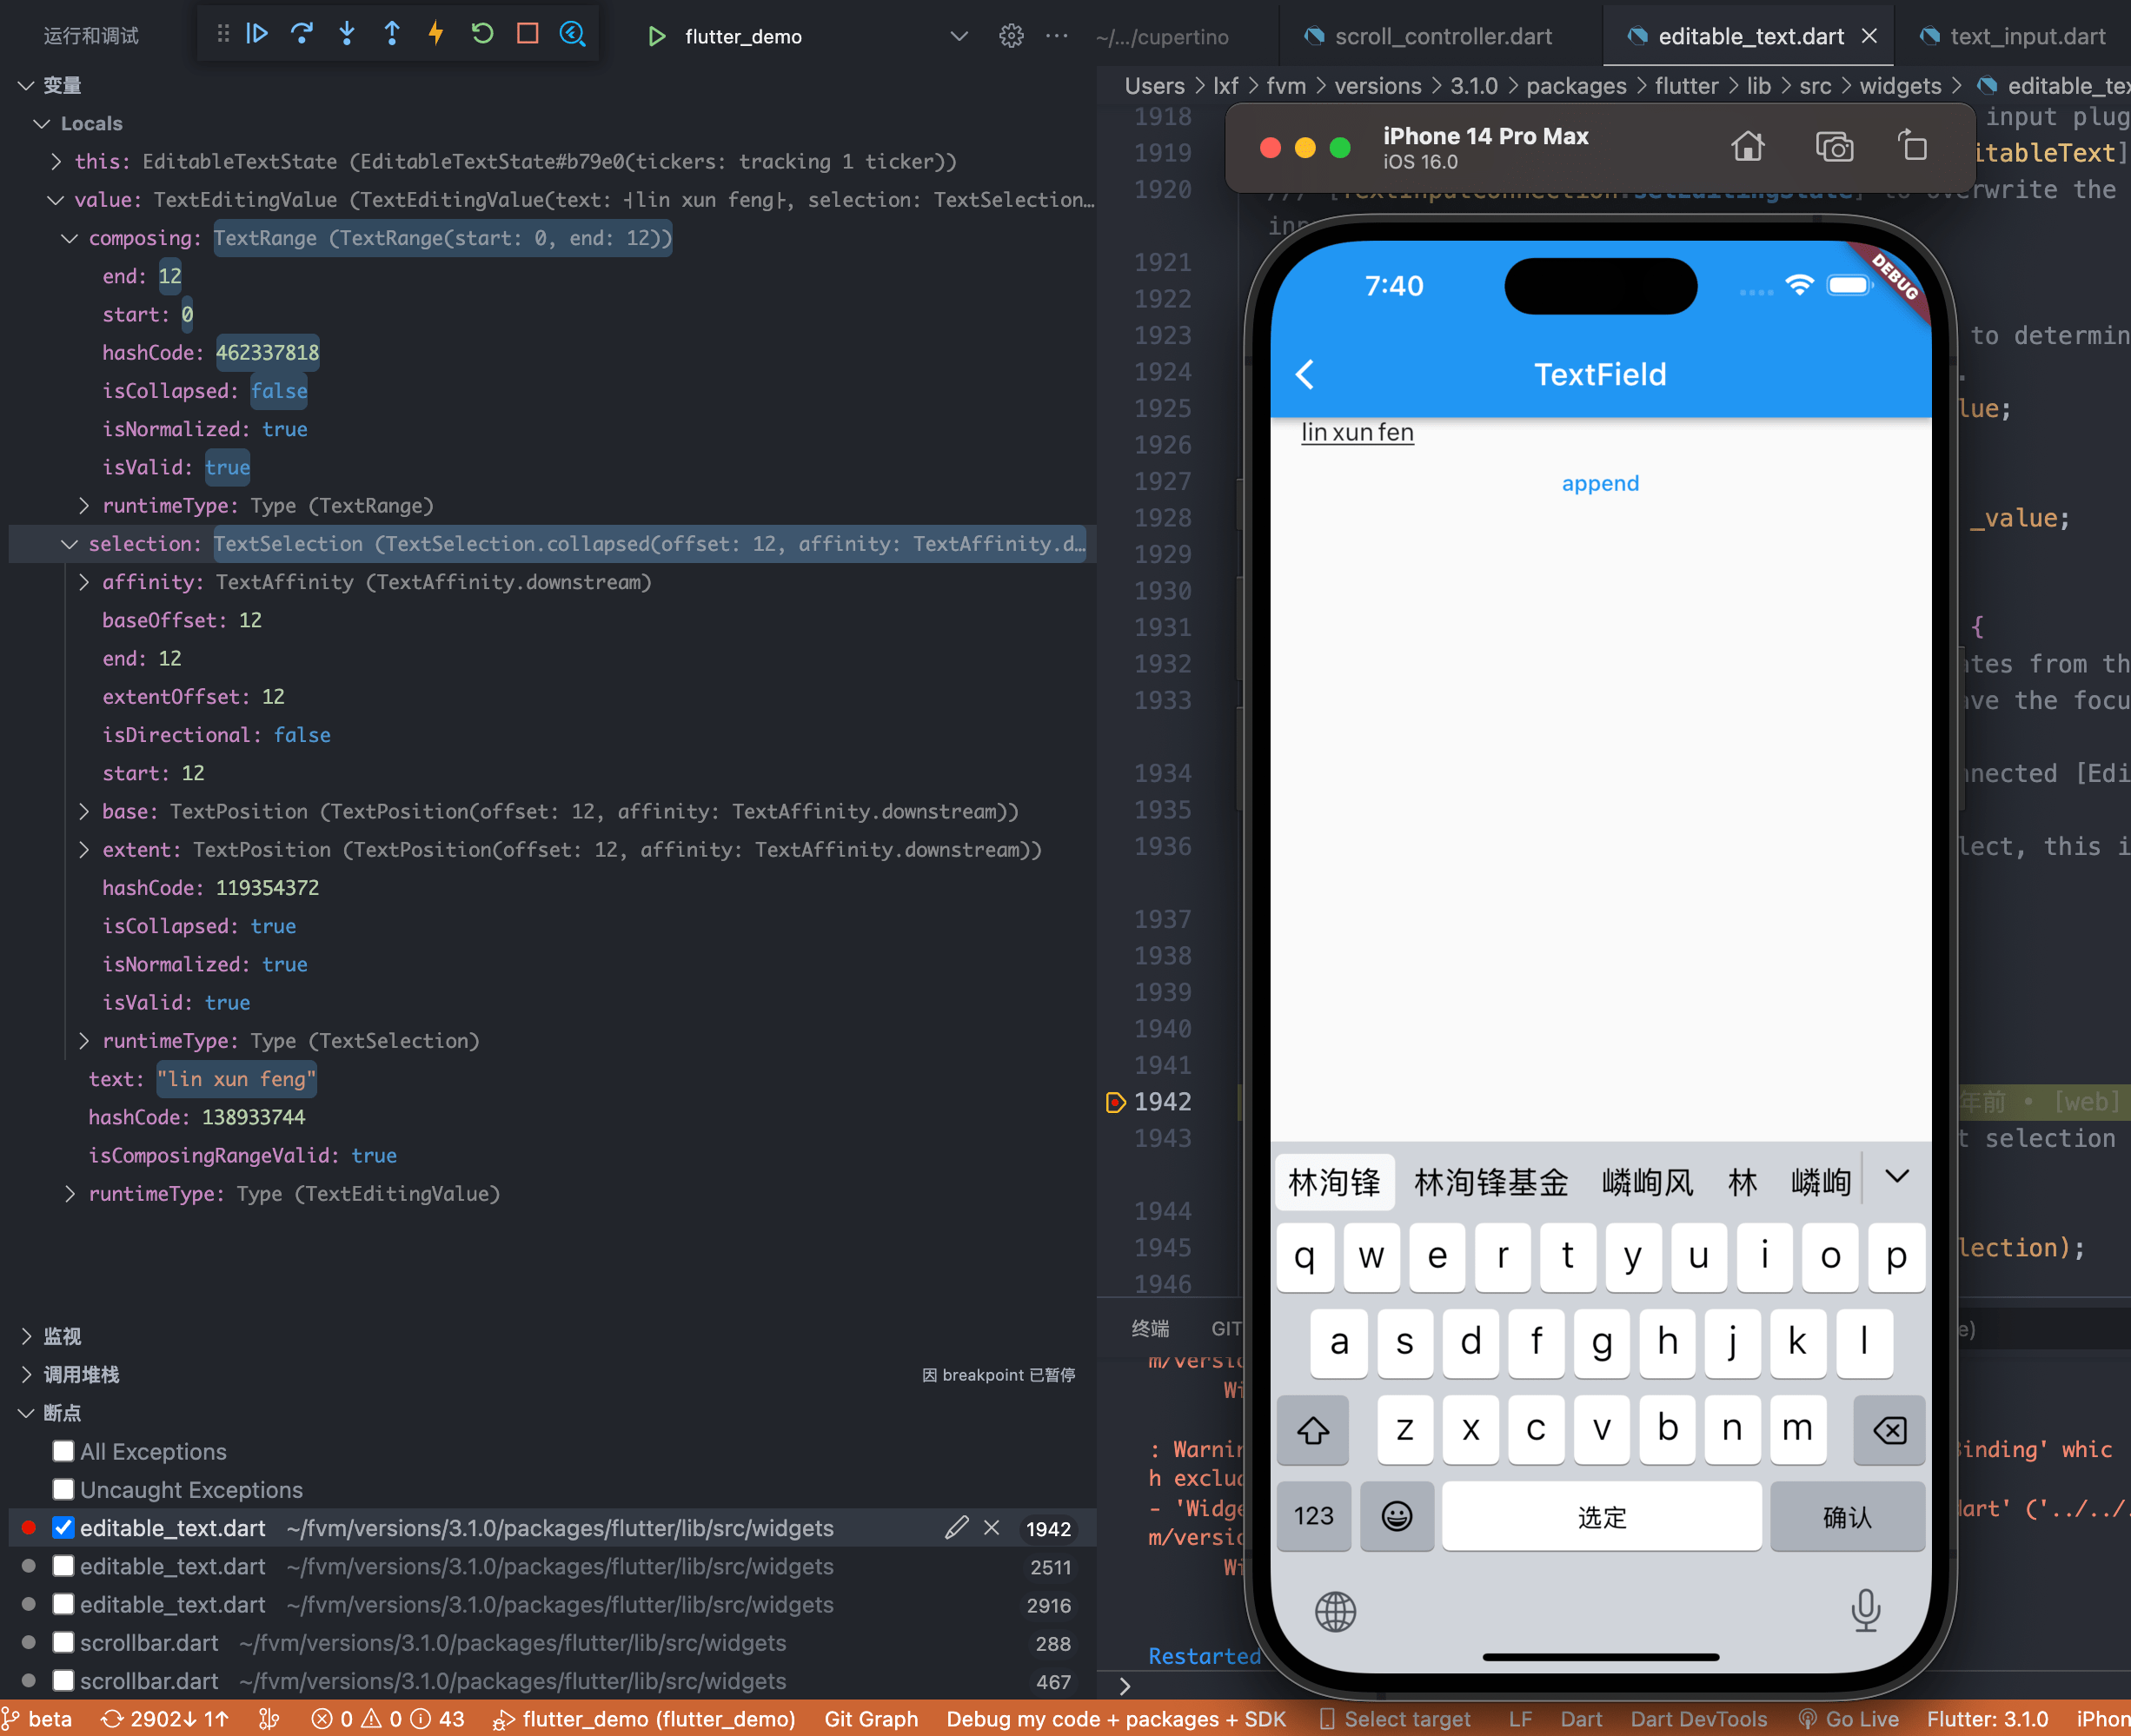
composing | 待组合内容的下标范围,在中文输入法中很常见,如下图中的 lin xun feng |
SelectionChangedCause:表明触发变更文本选中范围的原因,常见的几种方式如下代码所示
/// Indicates what triggered the change in selected text (including changes to
/// the cursor location).
enum SelectionChangedCause {
  /// The user tapped on the text and that caused the selection (or the location
  /// of the cursor) to change.
  tap,

  /// The user tapped twice in quick succession on the text and that caused
  /// the selection (or the location of the cursor) to change.
  doubleTap,

  /// The user long-pressed the text and that caused the selection (or the
  /// location of the cursor) to change.
  longPress,

  /// The user force-pressed the text and that caused the selection (or the
  /// location of the cursor) to change.
  forcePress,

  /// The user used the keyboard to change the selection or the location of the
  /// cursor.
  ///
  /// Keyboard-triggered selection changes may be caused by the IME as well as
  /// by accessibility tools (e.g. TalkBack on Android).
  keyboard,

  /// The user used the selection toolbar to change the selection or the
  /// location of the cursor.
  ///
  /// An example is when the user taps on select all in the tool bar.
  toolbar,

  /// The user used the mouse to change the selection by dragging over a piece
  /// of text.
  drag,

  /// The user used iPadOS 14+ Scribble to change the selection.
  scribble,
}
该参数为可选参数,对于我们这种使用 TextEditingController 对输入框内容进行修改的方式,传 null 即可。
需要调用的方式已经确定,接下来就是要获取 EditableTextState,我们先来看一下 TextField 的源码,因其为 StatefulWidget,所以需要找到对应的 State, 即 _TextFieldState
class _TextFieldState extends State<TextField> with RestorationMixin implements TextSelectionGestureDetectorBuilderDelegate, AutofillClient {
final GlobalKey<EditableTextState> editableTextKey = GlobalKey<EditableTextState>();
Widget build(BuildContext context) {
...
Widget child = RepaintBoundary(
child: UnmanagedRestorationScope(
bucket: bucket,
child: EditableText(
key: editableTextKey,
readOnly: widget.readOnly || !_isEnabled,
...
}
}
可以看到,最终 build 方法返回的是嵌套了 EditableText 的 Widget,我们只要获取到该 EditableText 的 State(即 EditableTextState) 就可以调用 userUpdateTextEditingValue 方法。
现在比较棘手的是,TextFieldState 是私有的,无法直接访问到,但是我们可以换种方式,直接遍历 Element 从而获取到 EditableTextState
void visitor(Element element) {
  if (element.widget is EditableText) {
    final editableText = element.widget as EditableText;
    final editableTextState =
        (editableText.key as GlobalKey<EditableTextState>)
            .currentState;

    // 找到 EditableTextState,调用 userUpdateTextEditingValue 方法
    editableTextState?.userUpdateTextEditingValue(
      TextEditingValue(...),
      null,
    );
    return;
  }
  element.visitChildren(visitor);
}

textFieldKey.currentContext?.visitChildElements(visitor);
至此输入框便可实现我们想要的效果了

注:
- 这里大家可以自行对遍历的方法和
userUpdateTextEditingValue的调用做下调整,毕竟每次变更输入框内容就遍历不好~ - 设置光标位置的代码不需要了,
userUpdateTextEditingValue方法内部会做这个事情
# 2、滚动条
只有 readOnly 为 true 时才会出现底部间距,对比 Scrollbar 的 updateScrollbarPainter 方法中的 padding 发现端倪
readOnly: true 的情况:
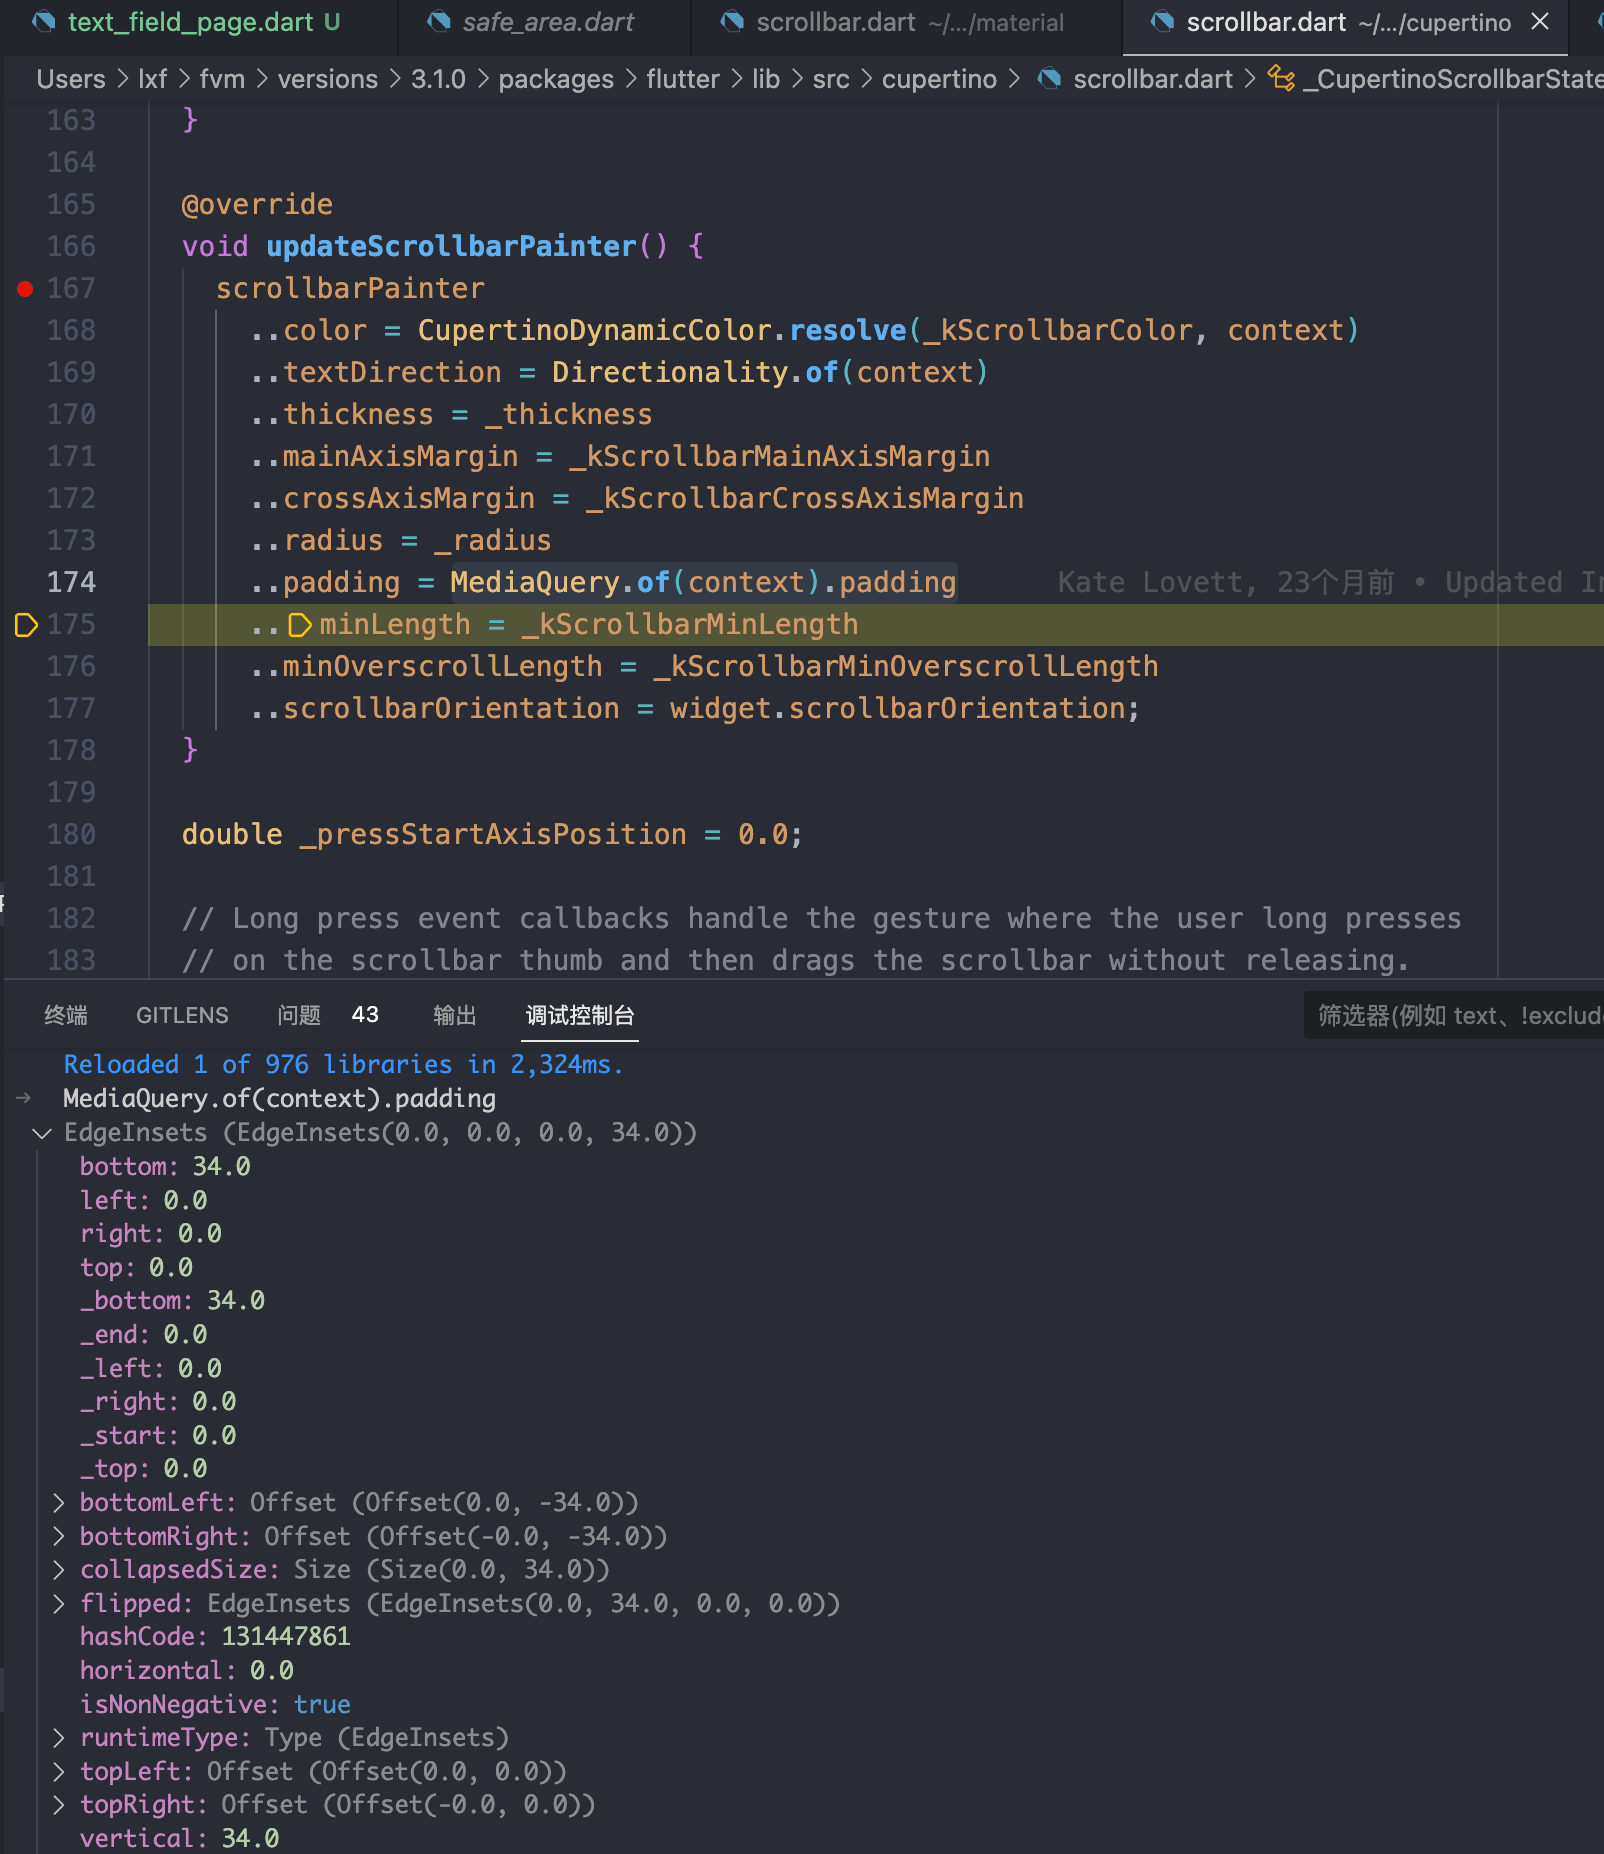
readOnly: false 的情况:
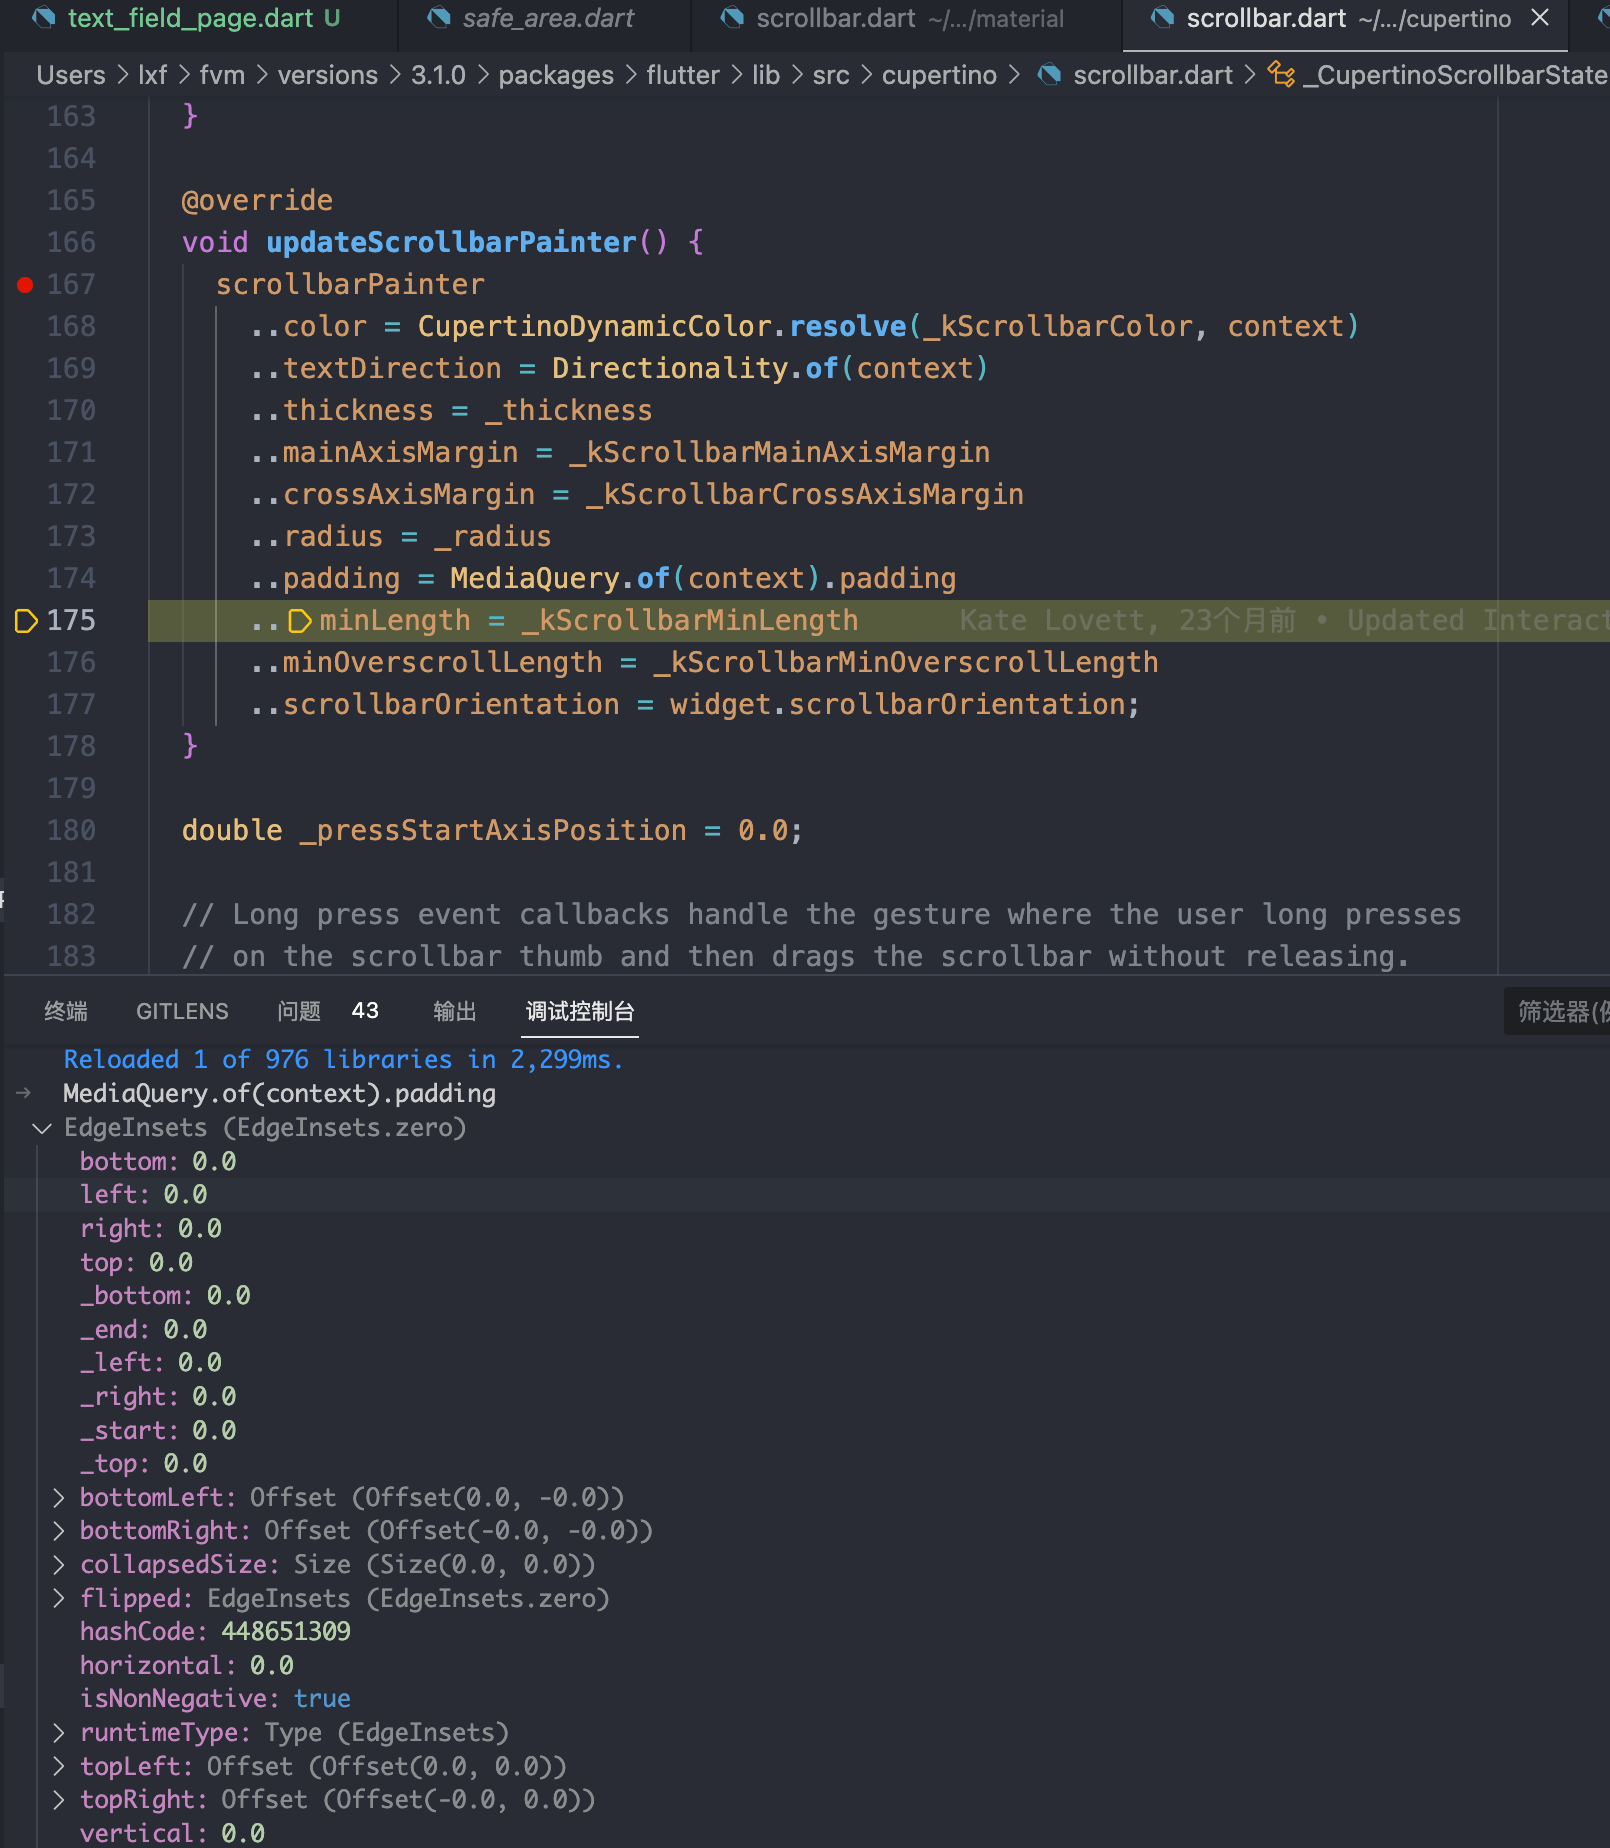
可以看到 readOnly: true 的情况下 padding 的 bottom 为 34.0,做 iOS 开发的小伙伴看到这个数值一定会觉得很熟悉,没错,就是底部安全区域的高度,而当键盘出现的时候,Scrollbar 是不可能接触到底部安全区域的,所以 padding 的 bottom 为 0。
这个时候我们只需要想办法让 Scrollbar 获取到的 padding 的 bottom 为 0 即可。这个不多说直接上代码:
MediaQuery.removePadding(
  context: context,
  child: _buildTextField(),
  removeTop: true,
  removeBottom: true, // 重点
);
# 四、最后
示例代码已同步至 GitHub: LinXunFeng/flutter_demo (opens new window)
